Building a shop, barn, or ADU?
The order of operations that saves money.
By Jeff Walters · April 28, 2026 · 9 min read
Most rural building projects on small acreage waste money in the same place: doing the dirt work in the wrong order, or breaking it into too many separate calls to too many contractors. Here's the order that actually works, what each step costs, and where most projects unnecessarily spend an extra few thousand dollars.
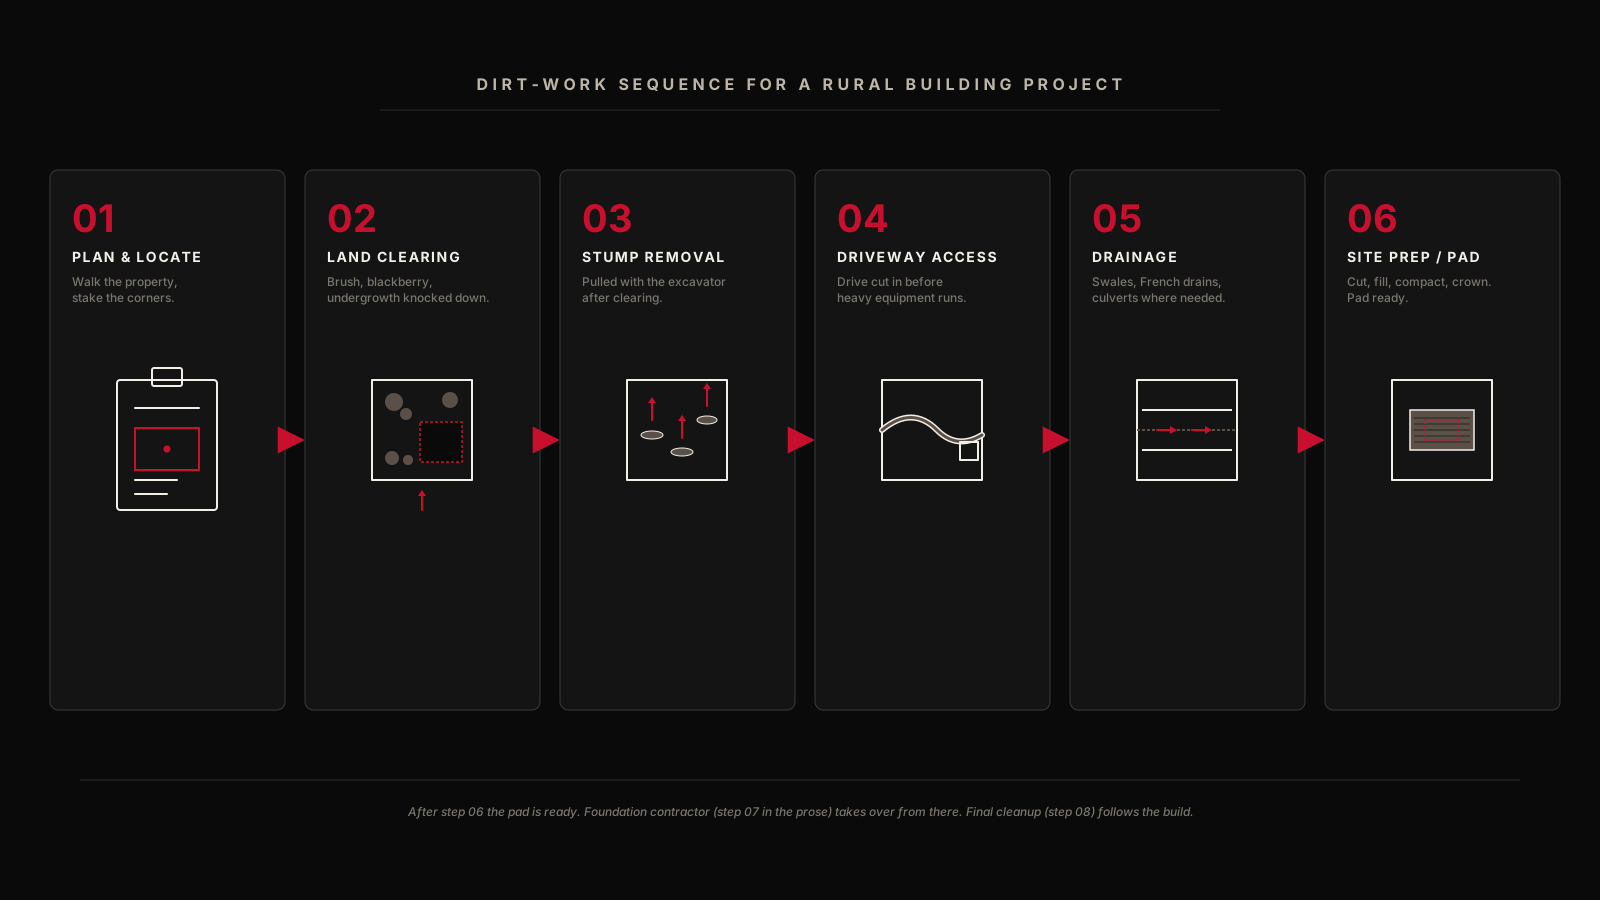
The right order, top-down
For a typical rural Linn County project — putting up a shop, barn, ADU, accessory dwelling, or any structure on previously-unimproved acreage — the dirt work runs roughly in this sequence:
- Plan and locate. Where the structure goes, where access comes from, where water flows now and where it will flow after.
- Land clearing. Brush, undergrowth, small trees in the building footprint and around it.
- Stump removal. Anything the brush cutter can't handle — pulled with the excavator after clearing.
- Driveway / access. If new construction needs a new driveway, that goes in before heavy equipment starts running back and forth across pasture.
- Drainage. Anything the property needs done before the pad goes in — French drains, culverts, swales, regrade-to-redirect-water.
- Site prep / pad work. Cut to elevation, fill, compact in lifts, base course, top course, crown.
- Foundation contractor / building crew. Their job, on top of your finished pad.
- Final landscaping & cleanup. After the building's up, the perimeter cleanup, final grade adjustments, and any landscape work.
Reading that list, the order looks obvious. The way most projects waste money is by either skipping a step (then doing it later, more expensively) or by hiring the steps as separate jobs that pay separate mobilization fees.
Step 1: Plan and locate (free, but skipping it is expensive)
Before any equipment shows up, walk the property with a clear sense of the structure you're building. Where exactly is it sited? Where does the access road come from? Where does water move on the property today, and where will it move after the building is up? Are there underground utilities (well, septic, electrical, propane) in the way?
A useful exercise: walk the property in a heavy rain. Where the water flows tells you the truth about drainage in a way that staking and tape measures don't.
This step doesn't cost anything except time, but skipping it is the source of most expensive project failures we see — buildings sited in the wrong spot, drainage that has to be retrofitted after the structure's up, access that can't accommodate the contractor's truck, septic systems that conflict with the new build.
Step 2: Land clearing (don't half-clear)
If the building site has any brush, undergrowth, small trees, or overgrown pasture, that needs to come out. Not just the footprint — clear at least 10–15 feet around the perimeter so the foundation crew can work, the framers can stage materials, and the eventual building has working space.
Common mistake: clearing only the exact footprint. Then the foundation crew shows up and discovers the brush is still up to the line, can't position their equipment, and you're paying day rate while we come back to do additional clearing they could have requested as part of the original scope.
Approximate cost: $1,000–$3,000 for typical residential clearing around a building site, depending on density. See our full pricing guide for the breakdown.
Step 3: Stump removal (in the same job)
Once the brush is down, you can see the stumps. If there are stumps in or near the building footprint, they need to come out before any pad work — leaving stumps under a pad creates rotting voids that compromise compaction and can cause settling years later.
Critical: quote stump removal as part of the same clearing job. Mobilizing the equipment back to the property as a separate trip costs the same in mobilization fees as the work itself — for a small stump count, the second trip can double what the work should cost. Get clearing and stumps quoted together. See stump removal for what's involved.
Step 4: Driveway and access (before, not after)
If your building project requires new or extended driveway access, get the driveway in before heavy construction equipment starts running across the property. Reasons:
- Equipment trucks, concrete trucks, lumber deliveries — they all need a drivable surface.
- Running heavy vehicles across pasture in winter creates ruts that take years to recover.
- A graveled driveway can serve as the construction access route, then become the permanent driveway. Doing it after means rebuilding it.
The driveway also needs the proper culvert at the entrance and any drainage work where it crosses water. See our driveway flooding guide for what entrance drainage looks like, and the driveway service page for the full scope.
Step 5: Drainage (everything that needs to happen before the pad)
This is the step most often skipped, and it's where most expensive retrofits live. If your building site has any existing drainage problem — water that pools, ground that stays soft into July, runoff that drains across the planned location — that problem needs to be solved before the pad goes in.
Why: a building pad on undrained ground is a slow-motion failure. The water that used to pass through the site now backs up against the pad. The pad's edges saturate. Settling starts. Within a few years, the building's slab is cracked, the doors don't close, and the fix involves jacking the structure off the pad.
Drainage interventions that often need to happen pre-pad include: French drains uphill of the pad, swales redirecting surface flow, curtain drains intercepting groundwater, culverts under the access drive. Even a modest pre-pad drainage investment ($1,500–$3,500) saves an order of magnitude in eventual retrofit costs. See our drainage service for what these solutions look like.
Step 6: Site prep / pad work
Now the actual pad. Strip topsoil and organics. Cut to elevation per your contractor's spec (often a few inches below finish floor elevation, accounting for slab and any below-slab gravel). Fill where needed. Compact in lifts — multiple passes with the skid steer's weight and a vibratory plate, not dumped at full thickness.
Add base course (typically 4–6" of crushed rock for residential pads). Compact again. Top with whatever the next-trade spec calls for — often a final ¾-minus or compacted base ready for the concrete crew.
Crown the pad slightly toward the lower side so water sheds. Even pads that will be slabbed benefit from a crowned subgrade — water doesn't pool under the slab.
See our site prep service for the full scope, or shed & RV pads for the smaller-scale version.
Step 7: Foundation / building crew (their job, on your pad)
Once the pad is finished, the next contractor takes over. For a slab-on-grade shop, that's a concrete crew. For a pole barn, that's the pole-barn installer. For an ADU, it could be a full GC running multiple subs.
Important: have the next contractor walk the finished pad before signing off on it. Their spec drives ours — they need to confirm elevation, dimensions, and any specific compaction requirements they have. A good dirt-work contractor coordinates this directly with your next trade so the handoff is clean.
Step 8: Final landscaping & cleanup (the often-forgotten step)
After the structure is up, there's almost always cleanup work — the perimeter where construction trampled the ground, the disturbed area around the access road, sometimes a final grade adjustment to direct water away from the new structure.
Most building projects forget to budget for this and end up with a finished structure on a partially-trashed property. A small final cleanup pass — typically half a day of dirt work — leaves the property looking finished, not just structurally complete.
Bundling: the math that saves money
Here's where the order matters financially. Each separate dirt-work mobilization costs roughly $200–$400 just to load equipment, drive to your site, and set up. Doing each step as a separate job multiplies that cost across however many trips you make.
Doing the whole sequence as one bundled project means: one mobilization, equipment stays on site (or at least nearby), the operator already knows the property and your goals, and the same person can flow from clearing to grading to drainage to pad without re-explaining anything.
Realistic savings on a typical shop project: $1,500–$3,000 over the cost of running each step as a separate one-off job. That's not even counting the time savings or the avoided coordination headaches.
What to ask your dirt-work contractor
If you're planning a shop, barn, or ADU, the conversation with your dirt-work contractor should cover:
- Can you quote the whole project as one job? (Almost always yes for a single contractor; not always cheaper across multiple contractors.)
- What's the order you'd recommend, and what depends on what?
- What do you need from my foundation/building contractor before you can start the pad? (Elevations, dimensions, compaction spec.)
- What's the realistic timeline from start of clearing to finished pad? (Usually 1–3 weeks for a residential shop project, accounting for weather.)
- What happens if drainage problems show up that weren't visible before clearing? (Change order conversation — should be addressed before signing.)
The bottom line
The cheapest, fastest, lowest-stress way to get from "raw acreage" to "finished pad ready for foundation" is a single coordinated dirt-work job that runs in the right sequence. Skipping steps creates expensive retrofits. Hiring each step separately doubles or triples mobilization costs. Doing them in the wrong order — pad before drainage, or driveway after construction — is how budgets blow.
If you're planning a shop, barn, ADU, or any rural building project in Linn County or the mid-Willamette Valley, we quote the whole package — clearing, stumps, drainage, driveway, pad — as a single job. See our site prep service for the umbrella, or request a walkthrough.
Building something?
Tell us what's going up. We'll quote the whole dirt-work side as one project.